
PageTatin Settings
The settings panel is where you configure your project details and personalise the app itself. Open it with the Settings button in the top bar, or via the menu bar (PageTatin → Settings on macOS, Edit → Settings on Windows).
Project
Section titled “Project”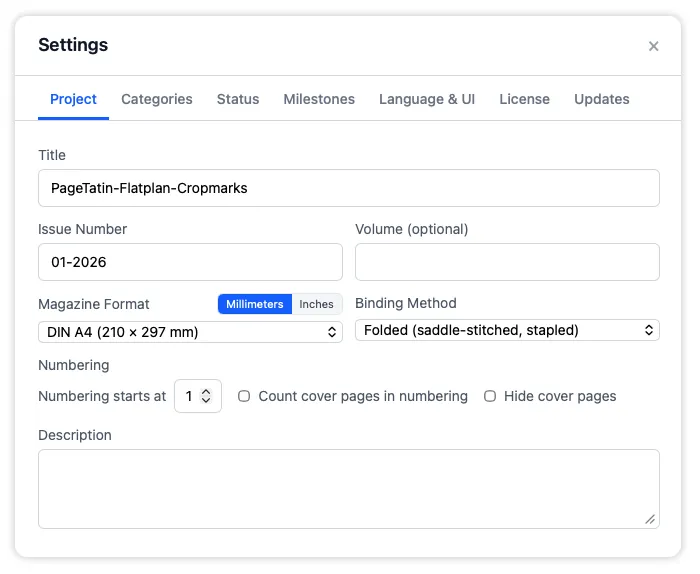
The project tab lets you change the core details of the current issue at any time:
- Title and issue number – rename the publication or update the issue number.
- Format – switch paper format or toggle between metric and imperial measurements.
- Binding method – change between saddle-stitched/stapled and loose-page binding. PageTatin uses this to check whether a page count is valid for print when you delete pages.
- Numbering – choose whether page numbers start from the cover pages or from the first interior page. The flatplan updates immediately.
- Hide cover pages – hide the four cover pages from the flatplan grid, useful when you want to focus on interior planning only.
- Description – a free-text field for any notes about the issue.
Categories
Section titled “Categories”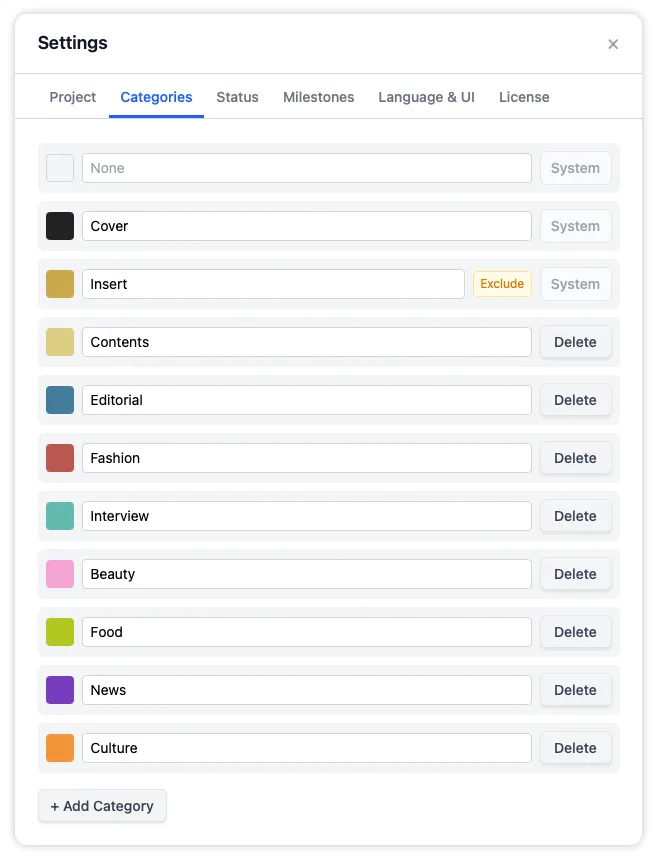
Categories are the section labels you assign to pages. PageTatin comes with a default set, and you can make them your own:
- Add a new category with the Add category button. It appears in the sidebar as you type the name.
- Rename any category by editing its name field directly.
- Recolor a category by clicking its color swatch.
- Delete any category you no longer need.
All changes appear immediately in the sidebar and on any pages already using that category.
Shortcut: hold Option (Mac) or Alt (Windows) and click any category or status – on a page or in the sidebar – to jump straight to its tab in Settings.
Status
Section titled “Status”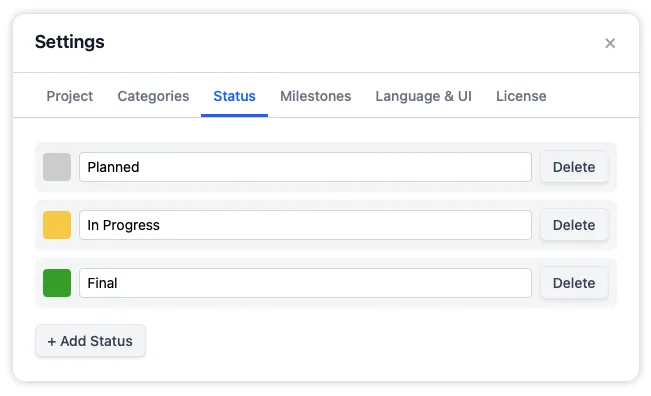
Statuses track each page’s position in your production workflow. The same options apply as for categories: add, rename, recolor, and delete. New statuses appear in the sidebar the moment you create them.
Milestones
Section titled “Milestones”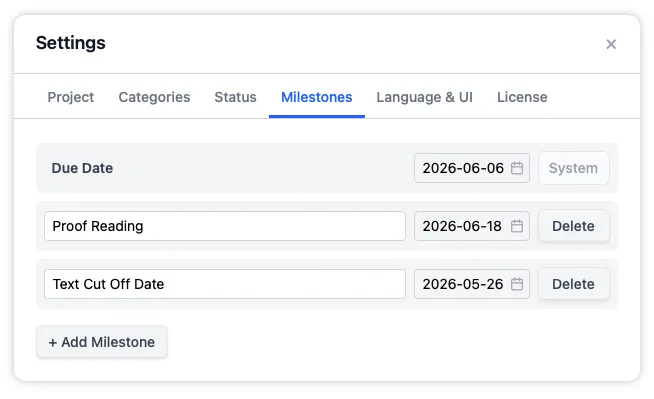
Milestones are dates that matter for this issue. The project due date you set at creation is always there; you can add as many more as you need – print deadlines, ad cutoffs, or anything else worth tracking.
To add a milestone: give it a name and a date. It appears in the top bar alongside your due date.
Milestones are color-coded by how close they are to the current date, getting more urgent as the date approaches:

| Days until milestone | Color | Meaning |
|---|---|---|
| more than 14 days away | light gray #eeeeee | neutral / plenty of time |
| 8–14 days away | pale yellow #fff8ac | first heads-up |
| 3–7 days away | pale orange #ffdfac | getting close |
| 0–2 days away, or overdue (flashing) | pale red / coral #ffb39f | due now or past due |
Language and UI
Section titled “Language and UI”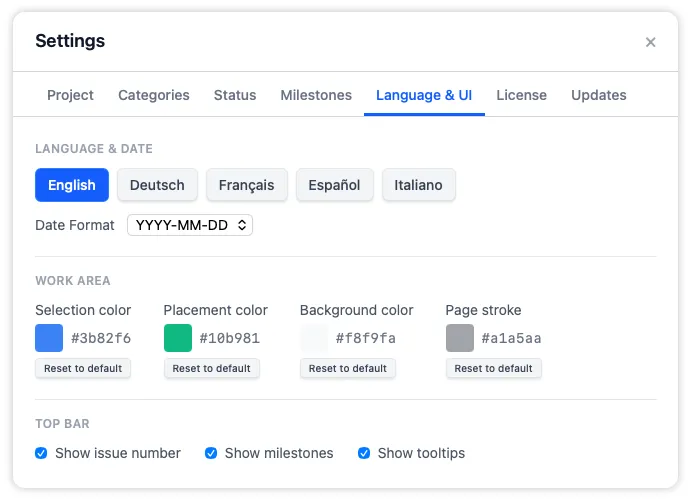
- Language – PageTatin is available in English, German, French, Spanish, and Italian. Switching language takes effect immediately.
- Date format – choose the format that matches your regional preference.
- Work area – customise the selection color (it tints the selected page and the drop target when you drag a thumbnail onto a page, ad, or region), the placement marker color, the page stroke color, and the background. A darker background is available if you prefer more contrast while working.
- Top bar options – toggle the issue number, milestones, and button tooltips on or off. Once you know the interface well, hiding the tooltips keeps things clean.
License
Section titled “License”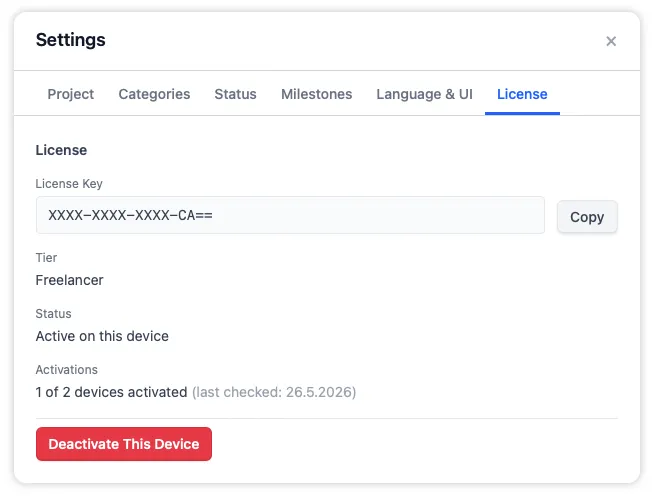
The license tab shows the details of your current activation:
- Your truncated license key.
- Your license tier – Freelancer or Small Team.
- The activation status on this device.
- Your current number of active devices.
If you need to move PageTatin to a different machine, click Deactivate this device. This releases the device slot on the license server so you can activate on the new machine using the same license key. See Activate your license and the License FAQ for more on managing devices.
Menu bar
Section titled “Menu bar”The menu bar offers an alternative route to most of the same actions. The key items worth knowing:
- File menu – new project, open project, save as…, export as .pdf, export as .json, close window.
- Edit menu – undo, cut, copy, paste, select all, and duplicate (duplicates the selected pages).
- View menu – full screen.
- Help menu – open the local PageTatin help, or submit a feature request or bug report by email.