
Create your first flatplan
When you open PageTatin for the first time after activation, you go straight into a project setup overlay. This article walks you through creating a project and getting your first flatplan running.
Setting up a new project
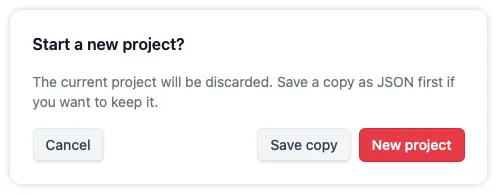
Section titled “Setting up a new project”Click the New Project button in the top bar. When you have your current project open, you will be presented with a message to either save a copy as a .json file (recommended) or to discard it and start a new project.
The setup overlay asks for a few basics:
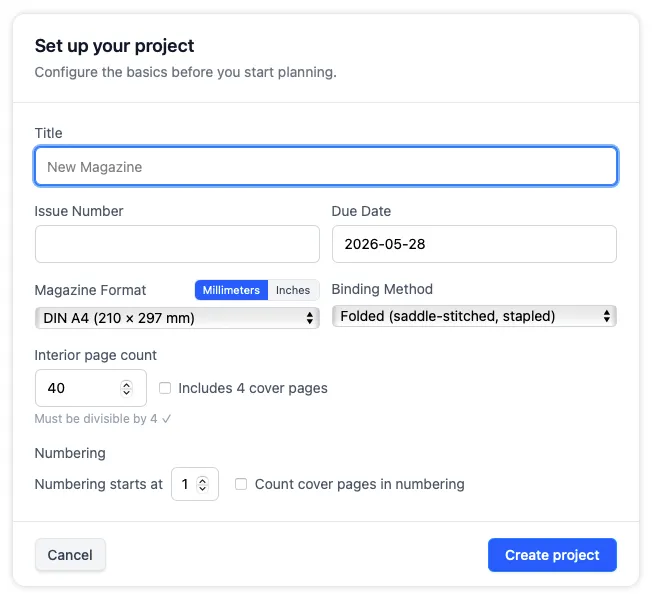
- Title and issue number – what this issue is called and its position in your publication sequence.
- Due Date – Usually the day you send your publication to the printer or release it on the web. This is your first milestone.
- Format – your page dimensions. You can switch between metric and imperial measurements.
- Binding method – saddle-stitched or stapled for folded magazines, or loose pages for perfect-bound, spiral-bound, or glued publications. This affects how PageTatin handles page counts when you add or delete pages later.
- Page count – the total number of pages, including covers.
- Cover pages – whether the four cover pages count toward the total.
- Numbering – you can decide to include or exclude cover pages form being counted.
Click Create and PageTatin opens your new flatplan.
The interface at a glance
Section titled “The interface at a glance”
The top bar runs across the top of the window. From left to right:
- Title, issue number, and due date – your project identity at a glance. The due date is set during project setup and can be updated in the Milestones tab of the Settings.
- Interior and total page count – a live count of your pages.
- Zoom slider – drag to zoom in or out. Click the left end for minimum size, the right end for maximum magnification, or double-click the slider itself to reset to the default 125%.
- Buttons on the right – in order:
- Undo
- Save as… (.tatin)
- Open Project
- New Project
- Export .pdf
- Settings
- Help

The undo button is a one-step undo for the last action you performed. Its tooltip always tells you what it will undo before you click.
The sidebar on the right is context-sensitive – its contents change depending on what you have selected. Click any page and the sidebar shows everything available for that page.
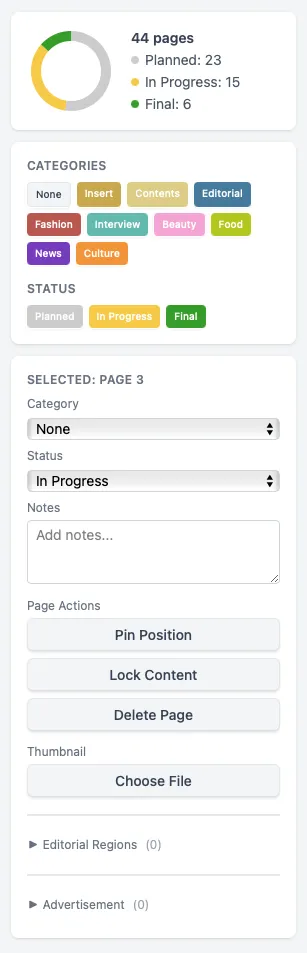
From top to bottom:
- Progress ring – a color-coded summary of how many pages are in each status.
- Categories – your section labels, each with its own color. Apply them by drag-and-drop or by selecting pages and clicking.
- Statuses – the production state of each page. Apply them the same way as categories.
- Selected page – category and status dropdowns, a notes field, and page actions for the currently selected page.
Applying categories
Section titled “Applying categories”Categories are how you label the sections of your issue. PageTatin ships with a default set, and you can customise names, colors, and add your own in the Categories tab of the Settings.
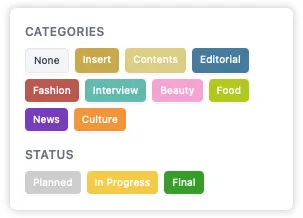
To apply a category to one or more pages:
- Select the page or pages – hold Shift for a range, or Command/Ctrl to pick non-adjacent pages.
- Click the category in the sidebar, or drag the category pill directly onto a page.
Pages take on the category color, giving you an instant visual overview of your issue structure.
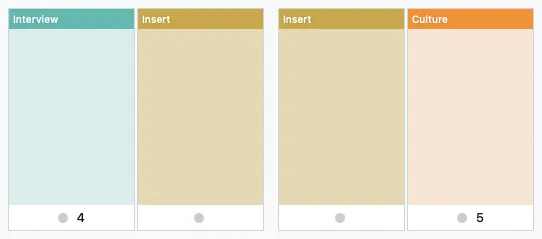
A special category – the Insert
Section titled “A special category – the Insert”Sometimes there are special pages in magazines, called inserts. Those pages can be additionally paid advertisements or advertorials that are glued onto existing pages and consist of only two pages. These pages are not counted towards the publication’s regular page count.
They start on a right-hand page and have to be followed by a left-hand page. In the flatplan those pages don’t have a page number, either. If you define pages as “Inserts” you have to fix your total page count.
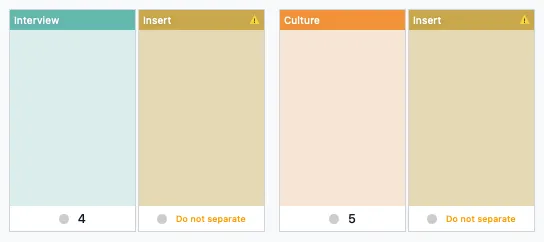
If you separate them by moving the left-hand page, you will get a warning not to separate them.
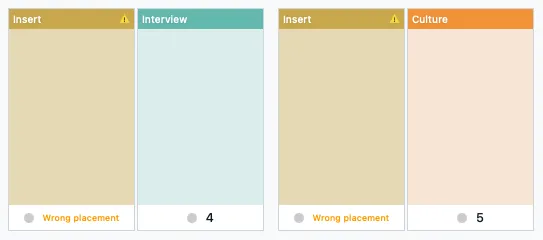
If you start the insert on a left-hand page, you will get a warning that the insert has a wrong placement.
Applying statuses
Section titled “Applying statuses”Statuses track where each page is in your production workflow. The defaults cover common stages, and you can rename them or add new ones in the Status tab of the Settings.
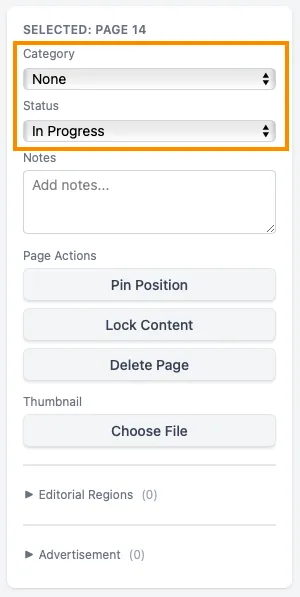
Apply a status the same way as a category: select the page, then click the status in the sidebar or drag the status pill onto the page. You can also use the dropdowns in the selected-page section of the sidebar.
Adding notes
Section titled “Adding notes”Select any page and type in the notes field in the sidebar. The note appears on the page thumbnail in the main view, so you can see it at a glance without clicking the page.
When you select multiple pages, you can bulk edit their notes all at once. Use the overlay to type your text and apply it to the whole selection.
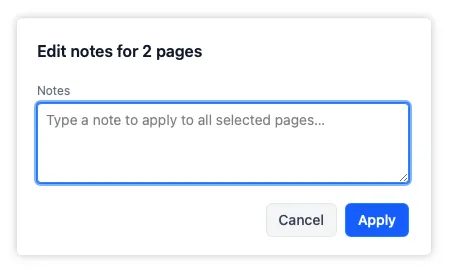
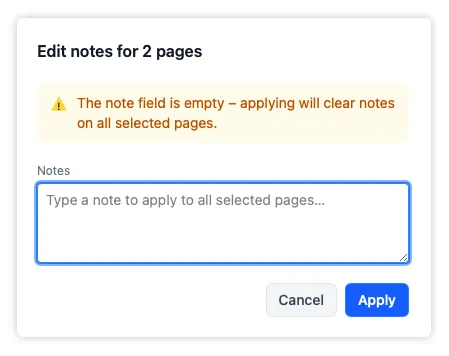
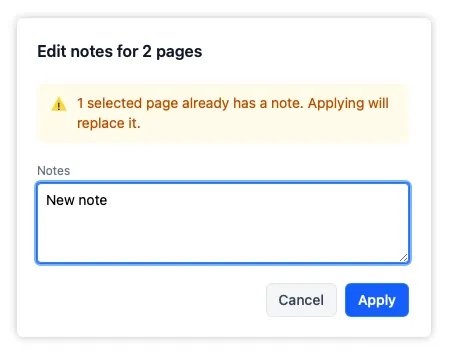
If you leave the text field empty, all notes on the selected pages are deleted. If some or all of the pages already contain notes, they are replaced with the new note.
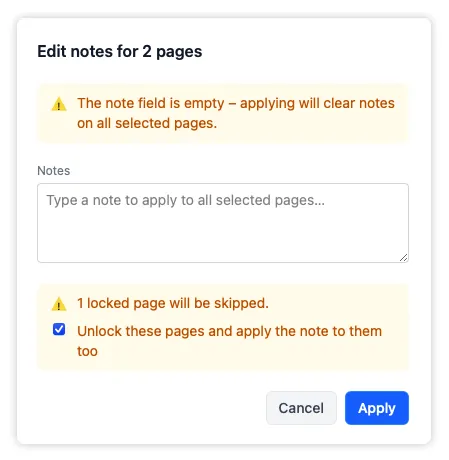
If there are locked pages in your selection, you can unlock them during the notes edit by ticking the optional checkbox – this includes them in the change.
Auto-save
Section titled “Auto-save”PageTatin saves your work automatically after every change, so you never lose progress – quit the app and reopen it, and you will be right back where you left off.
When you want your project as a file – to archive it, back it up, or move it to another machine – use the Save as… button in the top bar to save a native PageTatin file (.tatin). For backwards compatibility, you can still Export as JSON. See Exporting for the details.
What’s next
Section titled “What’s next”Managing pages and sections covers everything you can do with individual pages – moving, swapping, pinning, editorial regions, ad placements, and thumbnails. When you’re ready to share or back up your work, see Exporting.